There are times when you're animating something and it's a lot easier to have everything as one, big mesh, especially when pivot points and object-bounds start playing havoc with your carefully crafted animation and bizarre shit just keeps happening.
But then you're in a pickle with modelling. You really need to keep all those beautifully-designed objects separate.
What to do!? Well, how about an example…
Screenshots
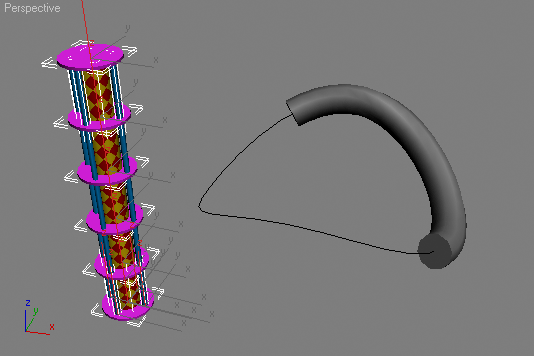
The objects on the left make up one "element", each with different mapping, materials, and obviously, pivot points.
The object on the right is a cylinder animated with a path deform to make it go round in a wiggly shape.
Animating all those objects on the left would be a major pain, so let's collapse and replace in once fell swoop:
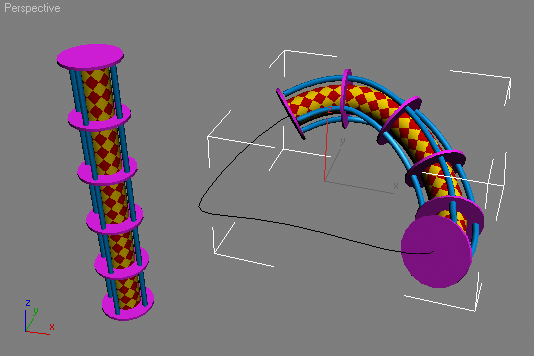
Great! And if new objects need to be added later, it's just a simple case of updating the animated object.
Interface
It's pretty simple.
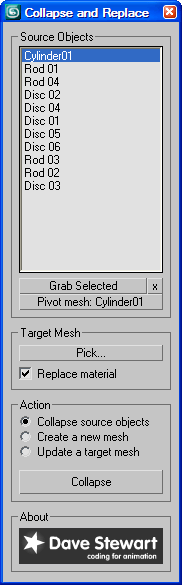
Pick the objects you want to collapse, pick a target mesh if required, pick the action you want…
- Collapse source objects – works like a regular collapse
- Create new mesh – the same as above, but duplicates the existing objects
- Update a target mesh – the same as option1, but assigns the mesh to another object's base mesh (great for animation)
… and click the button.
The only other option is to specify which of the original objects you want to use as the reference pivot point, which can be done by picking the object in the viewport, or by double-clicking the Source Objects list.
Download and Installation
Download…
- The MaxScript file: CollapseAndReplace0.61.ms
- The demo scene shown above: CollapseAndReplace.max
Just run the .ms file to create the dialog.